Text Aesthetics: Command Line UI/UX
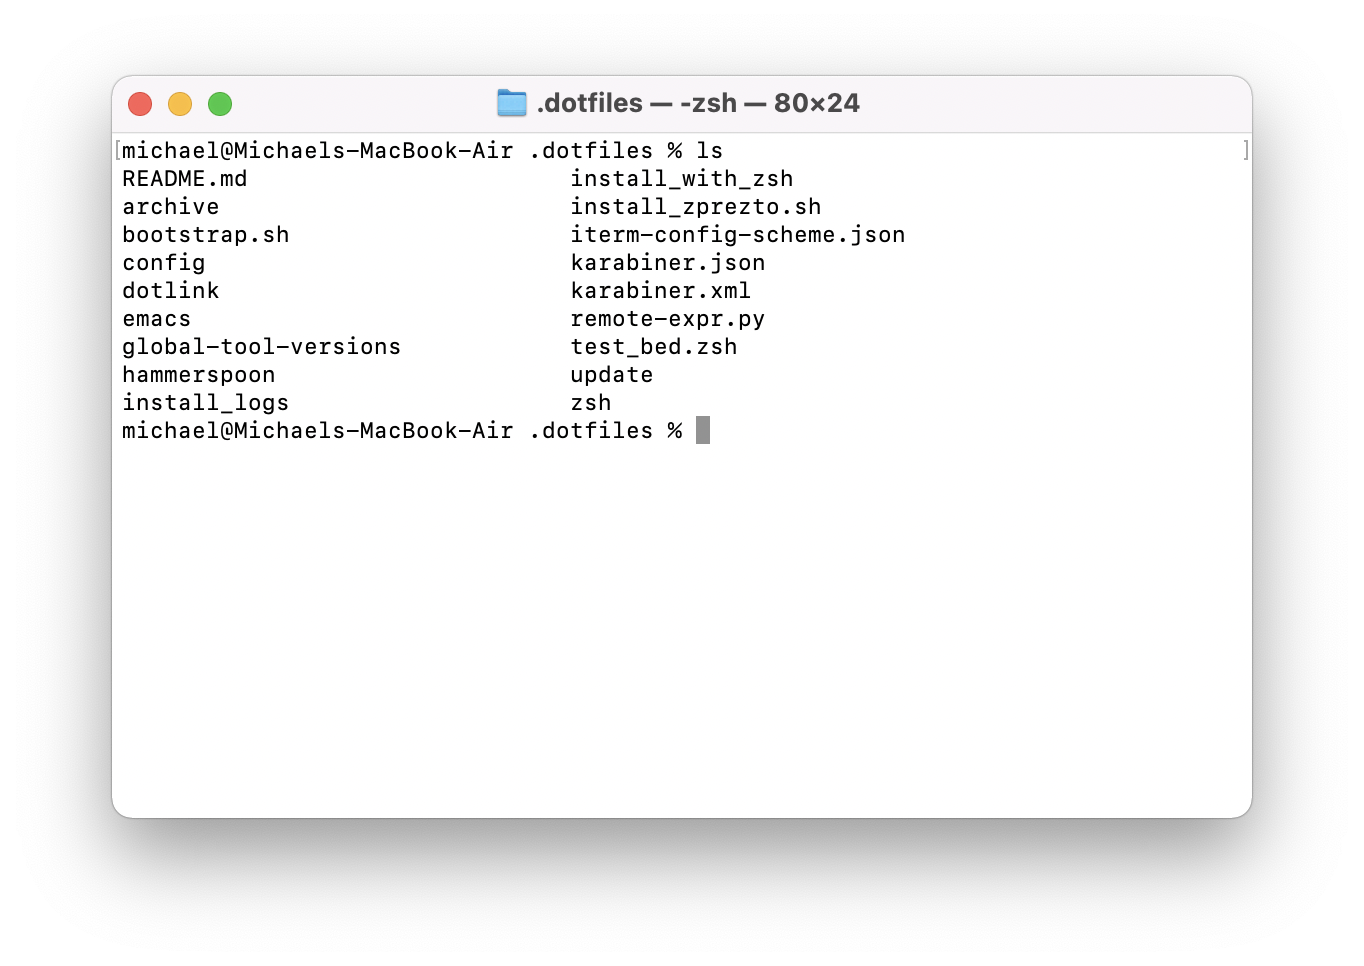
The first time you open Terminal, you are greeted with an aesthetic that can charitably be described as “retro”. Modern terminal emulators owe this interface to a legacy stretching back to Teletype. In the years since, we’ve seen evolution and shifts: mainframes/terminals, CRTs, Personal Computers, GUIs, and LCDs. While the defaults are anchored in the past, you are free to bring your command line experience forward to the modern era. In this post I’ll show the many ways you can customize your command line. Through this customization, you can have a more pleasant and efficient experience while retaining the power and flexibility of text-only software. We will start with the terminal emulator, the main window to your CLI. We’ll move on to the text and colors that style the interface. We’ll close with using prompts and status lines to bring context to your text interface.
This post discusses a range of options. I realize some prefer the most minimal “purist” terminal. Others want a command line that borders on an IDE. Regardless of where you land on that spectrum, the intent of this post into present a buffet of options. From this buffet, you can pick what you like and build your best command line.
Terminal Emulator
The first stop in the command line stack is the terminal emulator. Since most modern operating systems default to a GUI, they provide a program that emulates a terminal screenCertainly, you can run a terminal without a GUI. But at that point, your choices are limited to your OS.. This allows you access to your shell and command line programs. Each OS ship with a default, on macOS it is Terminal. On Windows it was Console, which has now been replaced with Windows Terminal. On Linux it will depend on distro, gnome-terminal and Xterm being common. You can enhance your CLI by looking at alternative terminal emulators besides the default. On macOS the clear winner is iTerm2, which contains a host of features (tmux and shell integration, a GPU renderer, and more). For other major platforms, there is alacritty, a Rust Open-GL terminal emulator. While I wouldn’t switch to alacritty over iTerm2 in macOS, I would use it in Windows and Linux environments. Before selecting form your options, I suggest finishing this post to determine what setup you want. Some features (e.g. ligatures) are not available in all emulators.
Colors and themes
I will not spend long on colors and themes since you are likely aware of them already. I currently use nord in my terminal, editor, and this blog. gruvbox was my daily driver for a long period and I also recommend it. Outside of that, I suggest checking out the gallery page, and then downloading one to your liking from the GitHubWhile originally meant for iTerm2, they have ports of the themes for other terminal emulators. If you can’t find your port, google the theme name and your terminal emulator..
Text
At first, the font you pick for your terminal emulator seems meaningless. Presumably you went with the default or selected a monospacedI assume it’s monospaced. People who do otherwise fall into the category of “chaotic evil”. based on what looked good in a screenshot. However, font selection also provides a mechanism to show icons and meaningful glyphs that convey information outside of words and colors. Base your font selection foremost on readability. The gallery at Programming Fonts allows you to compare fonts. You can even copy-paste code in a few popular languages to see exactly how it would look with syntax highlighting.
Ligatures
When selecting your base font, consider whether you want ligatures. Ligatures are a typography element where two characters are combined into a single glyph. For example, you might choose to represent the two characters “!=” as “≠”. The following code example presents side-by-side with and without ligatures.
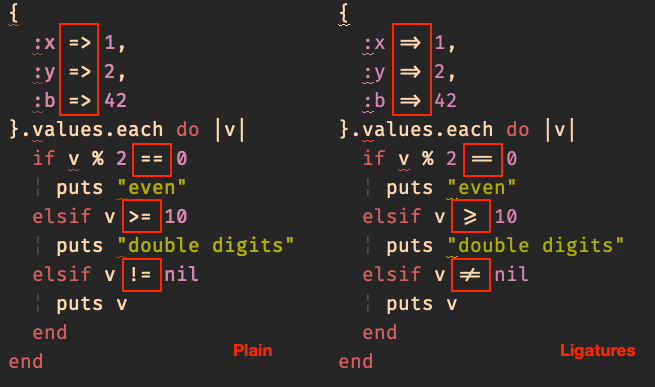
Ligatures are completely a matter of preference, and some people dislike them. It’s important to realize that the underlying characters do not actually change (it’s the same code), just their representation to you. In the above example, all I did for those screenshots was toggle ligatures on and off in iTerm. So go with whatever you like to look at / will understand. If you would like ligatures, select a font that supports them. ProgrammingFonts has a ligature-support filter so you can narrow the list. Alternatively, here are a few popular ligature-supporting fonts:
- FiraCode
- Hasklig
- Pragmata Pro (paid)
- Isoevka
Patching
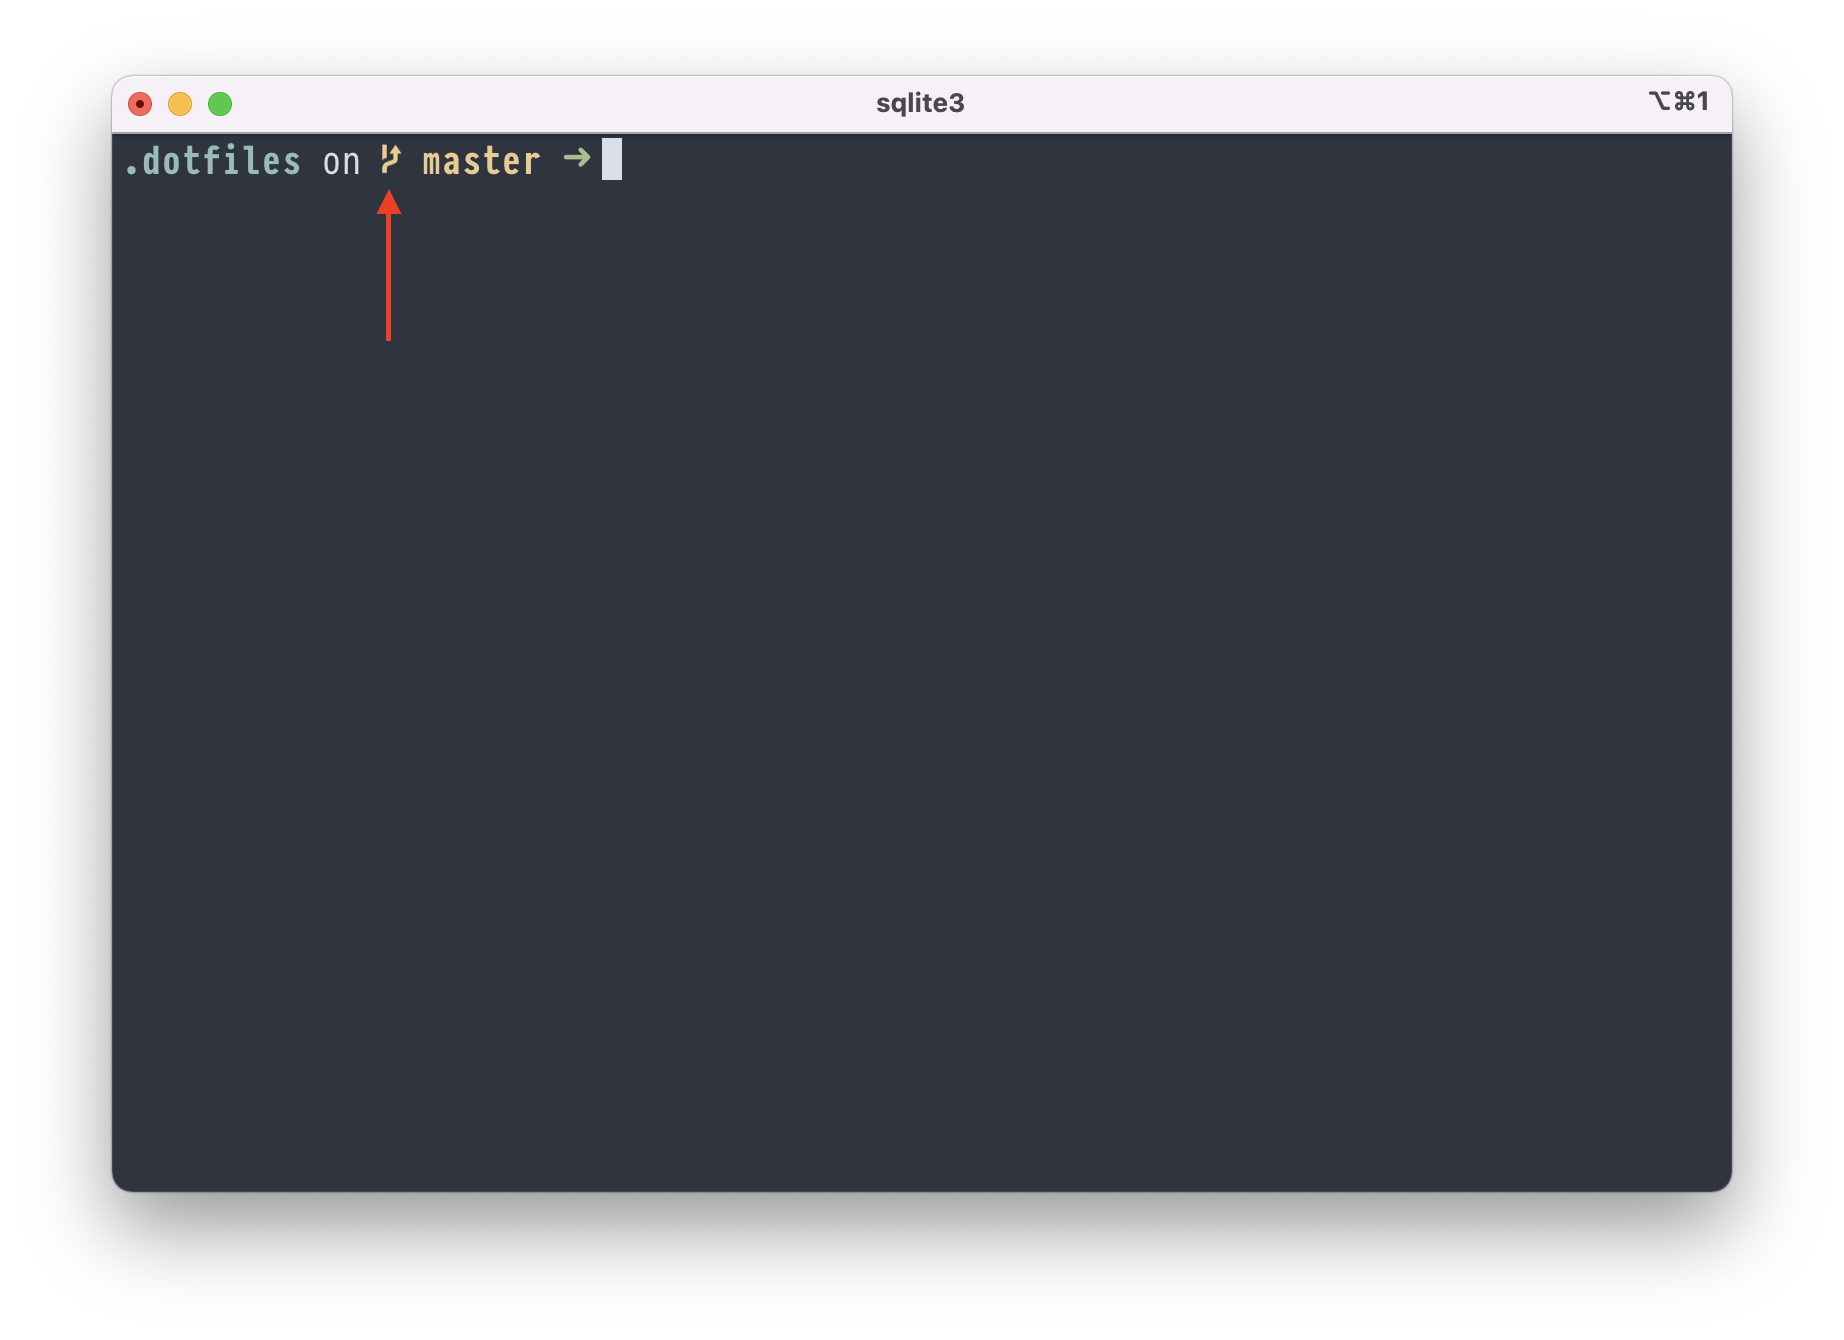
After you have selected your base font, you might patch it to add extra glyphs. Here are two examples which rely on custom glyphs to display icons throughout the text. The first is the starship prompt, note the git “branching” glyph:
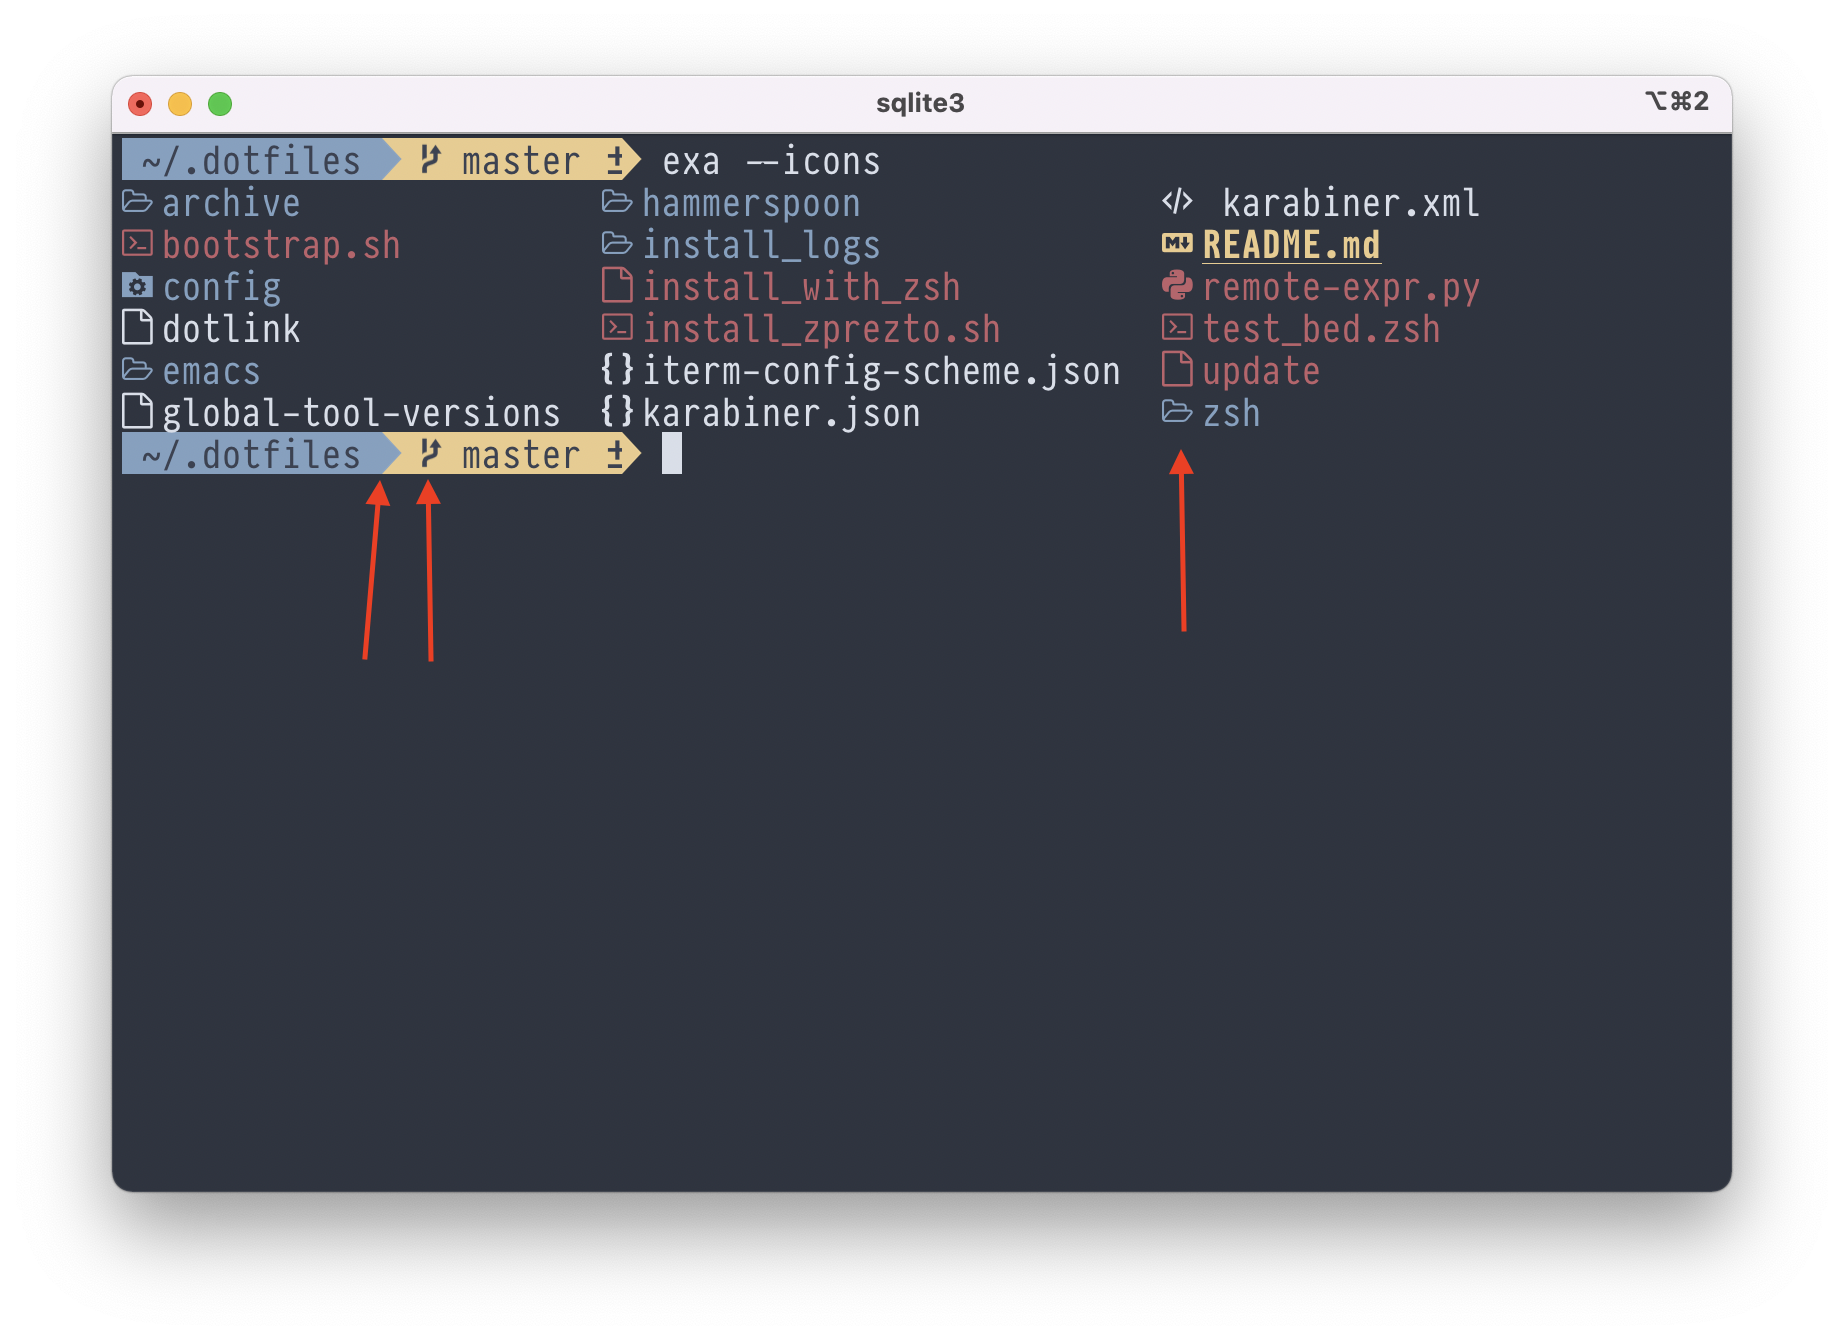
and the second is the prezto theme “agnoster” which uses glyphs to style the prompt. I’m also showing the output of exa with –icons which relies on glyphs:
On the font patching front, you have two common choices: powerline and NerdFonts. Powerline is a long run project, originally conceived to support vim status linespowerline is so common that the glyphs come built in to iTerm2 and can be toggled without installing a patched font. NerdFont is a project that rolls up several icon libraries, including powerline, to provide a single patched font. The easiest route to getting a patched font is to download a pre-patched version, NerdFonts’ is here and powerline’s can be found heremacOS protip: You can install either pre-patched font set via homebrew by tapping this cask and then installing as you would any other formula.
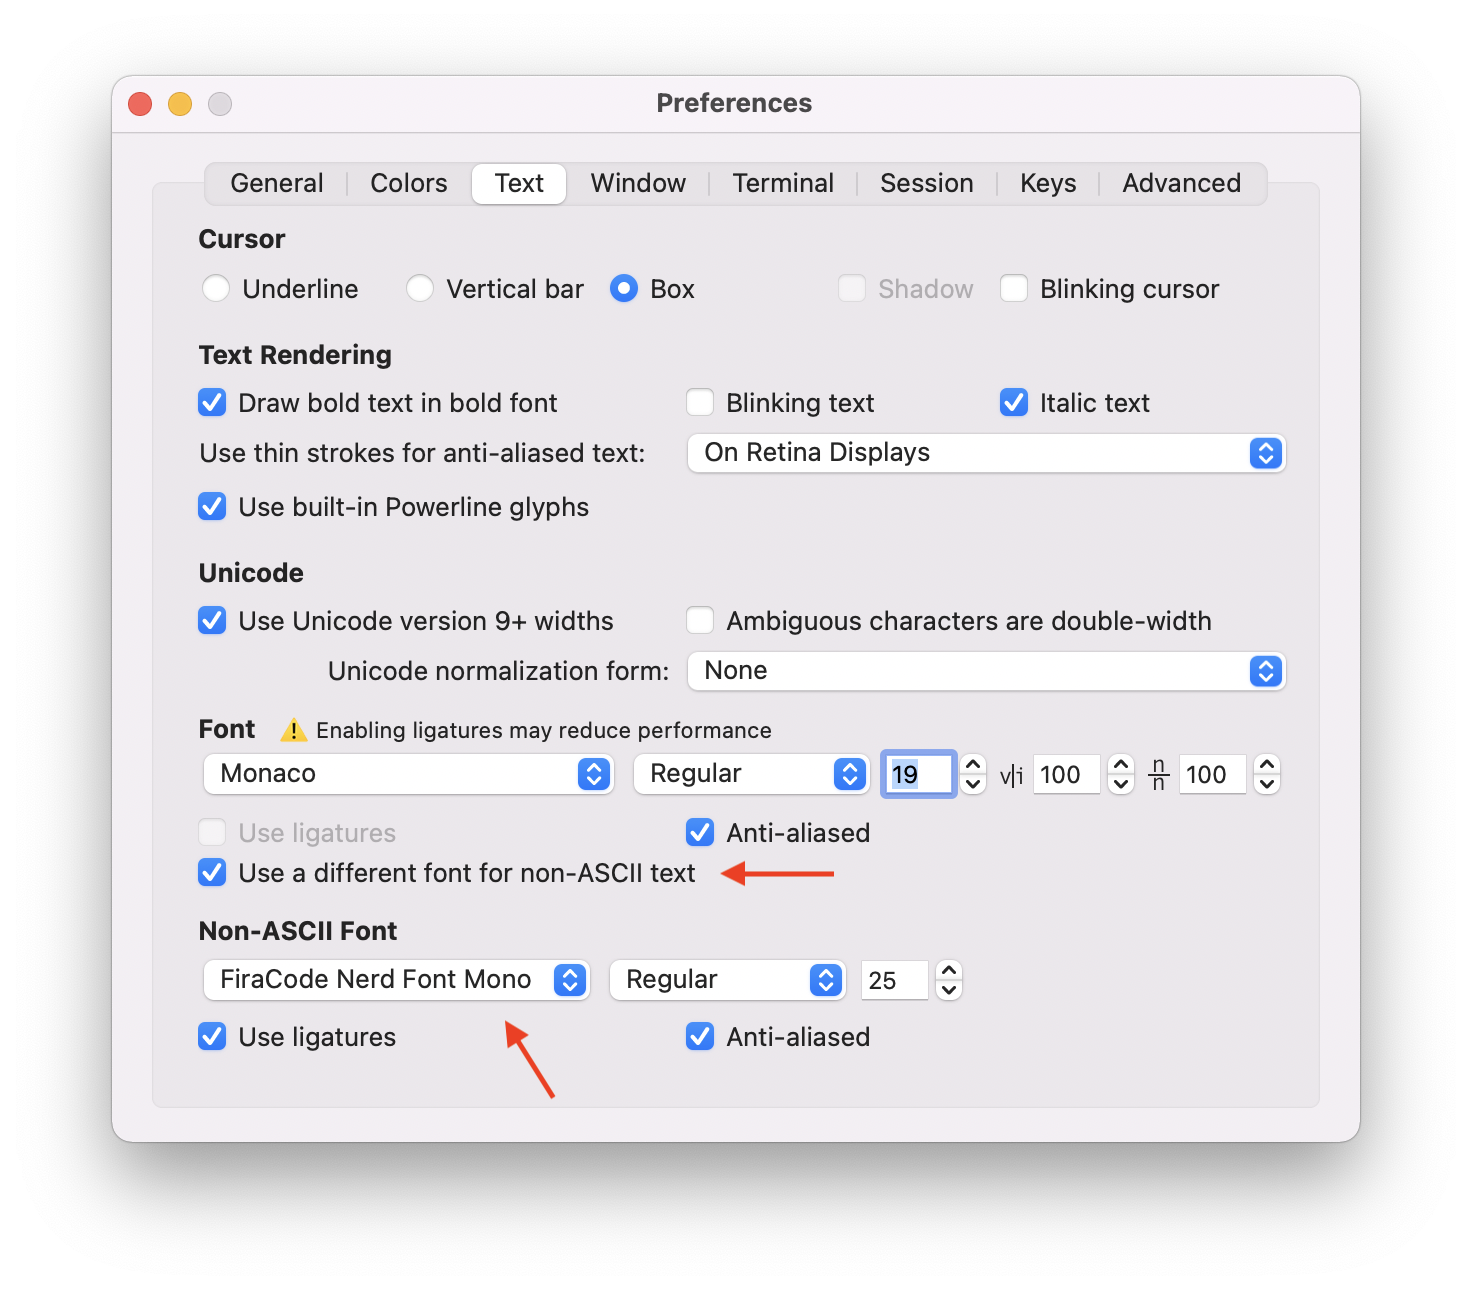
If the font you selected earlier is not available as a pre-patched font, you can also patch your font yourself. Instructions for powerline are found here and NerdFonts here. There is an alternative option to patching for iTerm2 users. You can set a different font for use with non-ASCII characters by navigating to your Profile -> Text. Tick the option “Use a different font for non-ASCII characters”. You could then select a pre-patched font for non ASCII characters (in this screenshot I’m using Fira Code) and use your base font for ASCII characters (here I am just using Monaco).
Prompt and Status lines
If we think of the roles of a terminal, we might divide them into accepting commands, displaying the output of those commands, and providing a context for the execution of those commands. Context can mean your working directory, the history of commands and their output (scrollback), or even the time you executed the command. Prompt and status lines both fulfill this third role. How far you take it is up to you. On one end, you may prefer a sparse terminal with little else besides a > and your input/output. On the other end you can load up a status line with your battery level, the weather, and other bits of information. Let’s look at some options.
Shell prompt customization
Prompts, as the name would imply, are there to prompt you for the next command to be entered. Shell prompts use a variety of symbols (%, $, >) to delineate the start of input capture. However, we can also precede the prompt symbol with bits of context (working directory/path being the most common and useful). For simple use cases, you can refer to the documentation for fish or zsh to customize it by hand. Bash is a bit more tricky, however you might look at ezprompt to easily build one with a GUI.
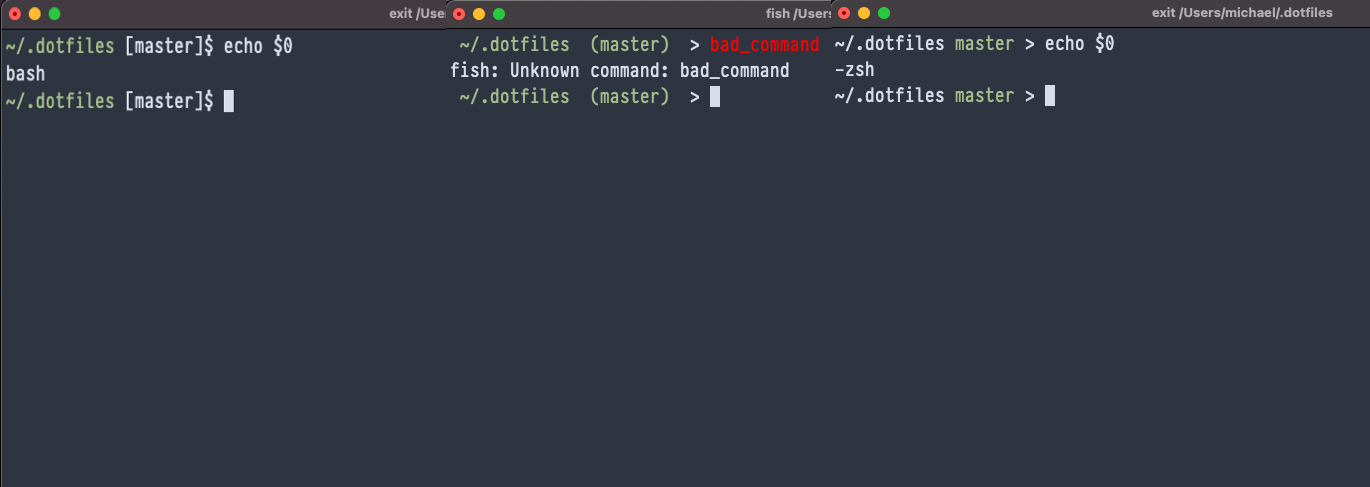
To show briefly, here is a side-by-side comparison of setting prompt to display working directory and git information across bash, fish, and zsh:
In .bashrc:
# get current branch in git repo
function parse_git_branch() {
	BRANCH=`git branch 2> /dev/null | sed -e '/^[^*]/d' -e 's/* \(.*\)/\1/'`
	if [ ! "${BRANCH}" == "" ]
	then
		echo "[${BRANCH}]"
	else
		echo ""
	fi
}

export PS1="\[\e[32m\]\w \[\e[m\]\`parse_git_branch\`\\$ "
In .config/fish/functions/fish_prompt.fish:
function fish_prompt
    printf '%s%s %s %s%s > ' \ (set_color $fish_color_cwd) (prompt_pwd) (fish_git_prompt) (set_color normal)
end
In .zshrc:
autoload -Uz vcs_info colors
colors
precmd() { vcs_info }
zstyle ':vcs_info:git:*' formats '%b'
PROMPT="%~ %{$fg[green]%}${vcs_info_msg_0_} %{$reset_color%}> "
Reflecting on these three snippets, you get a sense that zsh and fish both provide batteries for this type of solution, whereas bash you have to roll your ownCaveat: I adapted this bash script from ezprompt.
Frameworks
Setting the prompt manually works well if you have simple use-cases and want a speedy prompt. However, many people reach for a shell framework to provide prompt styling. Frameworks provide a host of features, but a common one is themes. Many of the themes are ported across the frameworks. For example, here is the “agnoster” theme in fish, shipped in oh-my-bash, and oh-my-zsh.
| shell | Frameworks |
|---|---|
| bash | oh-my-bash |
| zsh | oh-my-zsh, prezto |
| fish | oh-my-fish |
Cross Shell options
Prompt setting via the shell is the most direct way to add context. Further, as we’ve seen, much of the functionality you are likely looking for is ported across shells. But you may want a light shell config, or you dislike the aesthetics of complex prompts. So here are some shell-agnostic options.
iTerm2 status line
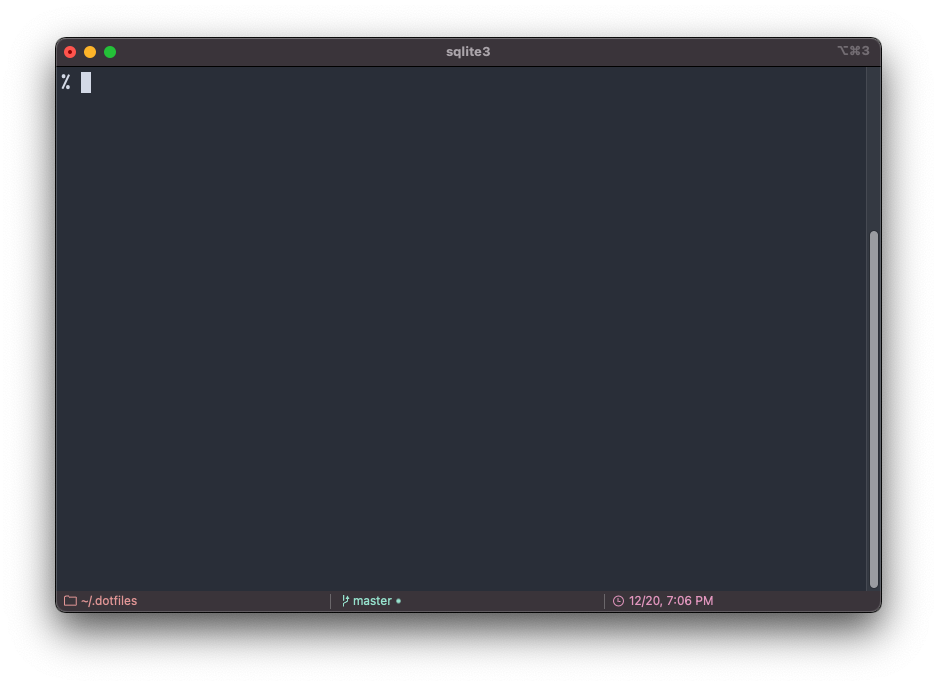
For macOS and iTerm2 users, there is a built in status line. It has some common information we’ve seen previously and the ability to extend with scripts. I have not looked deeply at this option, but if the below screenshot appeals to you, Profiles -> Open Profiles -> (for a given profile) -> Session -> Status bar enabled/Configure Status Bar The positioning of the side bar is in a separate menu item Preferences -> Appearance -> General -> Status Bar Location.
Starship
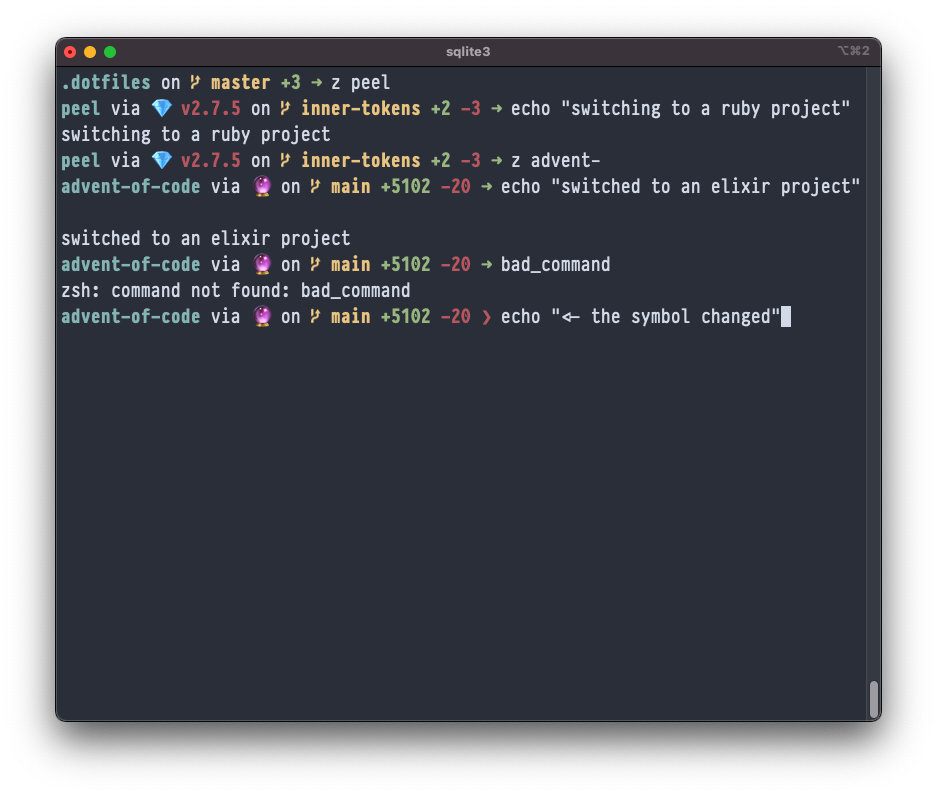
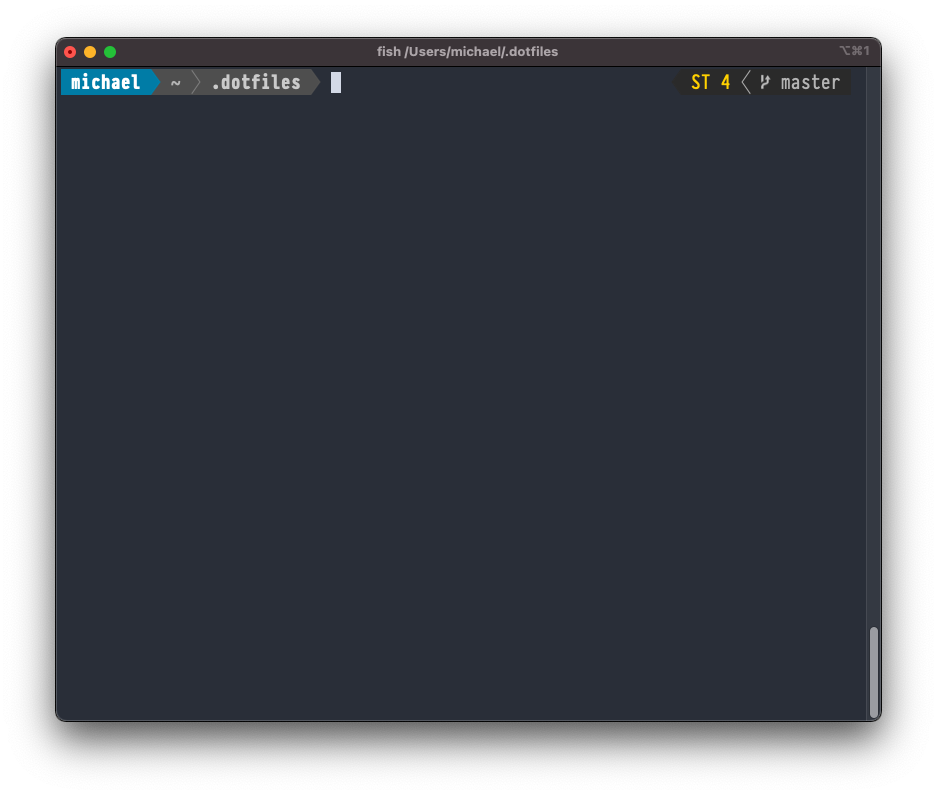
starship is a cross-shell prompt written in Rust. It’s highly configurable and I have been test driving it for a few months and noticed no speed issues. I’ve created a sample screen shot showing the type of information it embeds as I switch to a ruby project, an elixir project, and have a command fail.
Powerline
Powerline is a python project that originated as a status line within vim. It has since expanded to include shell prompts, windows managers, and tmux. If you are a heavy user of vim and tmux you might consider powerline. The downside to powerline is that it requires python. I had trouble getting it setup with pyenv and in the past I had to deal with paths changing whenever system python upgraded. There may be a more elegant solution.
tmux status line
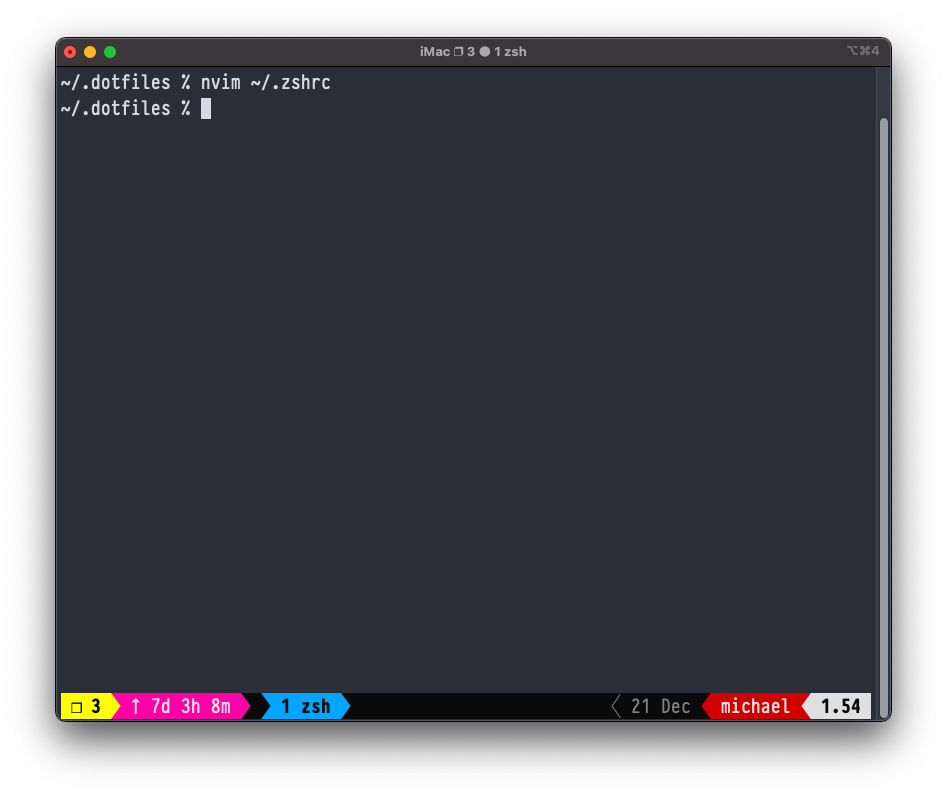
tmux is a rich, versatile tool, and technically it sits alongside our Emulator/Shell/(optional)Shell Framework stack. However, if you are a frequent tmux user, you can also use it to embed a status line. Similar to the shell, it can be configured by hand. Also like the shell, there are frameworks that make this process much easierIn this screenshot I am using the framework Oh my tmux!. Alternatively, you can use powerline as discussed above. I’d favor oh my tmux here as it’s pure shell scripts and doesn’t rely on python.
What do you use?
Currently, my stack looks like:
-
iTerm2 with the nord theme in both my shell and editor
-
zsh for shell with preztoI am currently thinking about removing prezto since I do not use many of the features
-
For text I use FiraCode patched with NerdFont and ligatures enabled
-
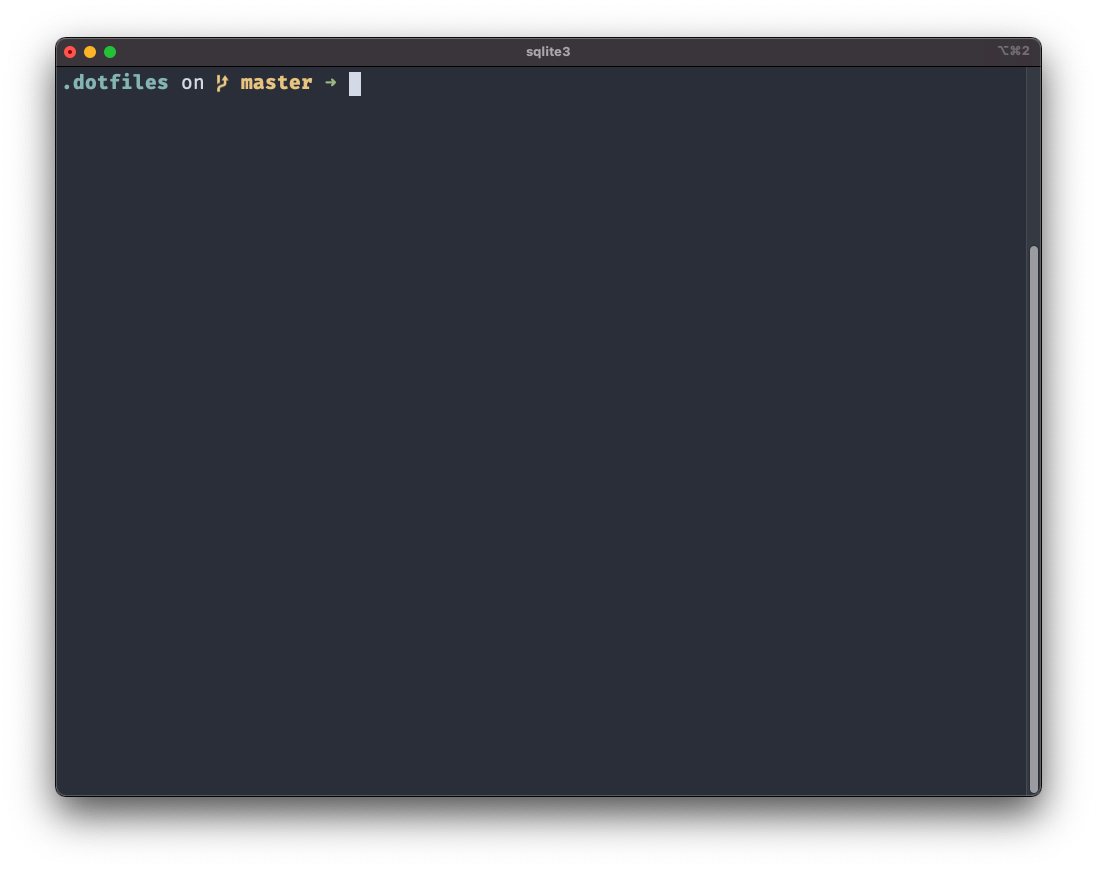
Finally, I use starship for prompt and oh my tmux when using tmux
This may seem like a heavy setup for some, but I find it fairly snappy and informative when working in the command line. If you are curious about a particular piece of the setup you can check my dotfiles repo.
Did I miss anything?
There is a wide world of CLI customization, and I’m sure I missed something. If so, please drop a note in the hackernews or reddit comments for this post.